Verdaccio
https://verdaccio.org/zh-CN/docs/installation
安装CLI
Verdaccio 必须使用以下方法之一全局安装
npm install -g verdaccio

yarn global add verdaccio

pnpm add -g verdaccionpm 出于安全考虑不支持以 root 用户运行,即使你用 root 用户身份运行了,npm 会自动转成一个叫 nobody 的用户来运行,而这个用户几乎没有任何权限。
这样的话如果你脚本里有一些需要权限的操作,比如写文件(尤其是写 /root/.node-gyp),就会崩掉了。
为了避免这种情况,要么按照 npm 的规矩来,专门建一个用于运行 npm 的高权限用户;要么加 --unsafe-perm 参数,这样就不会切换到 nobody 上,运行时是哪个用户就是哪个用户,即使是 root。
npm install -g verdaccio -unsafe-perm使用
首先启动 verdaccio,任意控制台执行命令
verdaccio出现以下信息表明安装成功  上面的config file显示的是verdaccio的配置文件的地址
浏览器中输入地址 http://localhost:4873/ 启动服务。这里显示上传过的组件。
config.yaml配置说明
verdaccio服务启动后,会在启动服务对应的目录下创建一个名为verdaccio的文件夹,文件夹下有个storage文件夹和config.yaml文件。
storage文件夹下存放的是 Verdaccio 存储的包,config.yaml文件是 Verdaccio 的默认配置文件。
# 存储路径
storage: ./storage
# 插件路径
plugins: ./plugins

# Web UI 相关的参数
web:
  title: Verdaccio
  # Gravatar 是一项全球性的头像服务,允许用户使用同一个邮箱在多个网站上使用同一个头像。在这里,将 gravatar 设置为 false 可以禁用 Gravatar 支持。
  gravatar: false
  # 包列表的排序顺序 (asc|desc) 默认为升序asc
  sort_packages: desc
  # 是否启用暗黑模式
  # darkMode: true
  # 是否启用 HTML 缓存
  # html_cache: true
  # 是否启用登录功能
  # login: true
  # 是否显示额外的信息
  # showInfo: true
  # 是否显示设置选项
  # showSettings: true
  # 是否显示主题切换选项
  # showThemeSwitch: true
  # 是否显示页脚
  # showFooter: true
  # 是否显示搜索功能
  # showSearch: true
  # 是否显示原始数据或源代码
  # showRaw: true
  # 是否显示下载 tarball 的选项,tarball 是一种常见的文件压缩格式,通常用于打包和传输文件。
  # 启用 showDownloadTarball 功能可以让用户更方便地获取到特定包的 tarball 文件,以便于离线安装或其他用途。
  # showDownloadTarball: true
  # scriptsBodyAfter:
  #    - '<script type="text/javascript" src="https://my.company.com/customJS.min.js"></script>'
  # metaScripts:
  #    - '<script type="text/javascript" src="https://code.jquery.com/jquery-3.5.1.slim.min.js"></script>'
  #    - '<script type="text/javascript" src="https://browser.sentry-cdn.com/5.15.5/bundle.min.js"></script>'
  #    - '<meta name="robots" content="noindex" />'
  # bodyBefore:
  #    - '<div id="myId">html before webpack scripts</div>'
  # 配置项用于指定公共路径或基础 URL
  # publicPath: http://somedomain.org/

# 身份验证,默认身份验证基于 htpasswd 并内置,可以通过插件修改
auth:
  htpasswd:
    file: ./htpasswd
    # 允许注册的最大用户数, 默认是无限制
    # 设置为-1,表示禁止注册
    max_users: -1
    # 哈希算法,可选项为“bcrypt”、“md5”、“sha1”、“crypt”
    algorithm: bcrypt # 默认算法是 crypt ,被认为对生产环境不安全,建议新安装改用 bcrypt
    # “bcrypt”的舍入数,对于其他算法将被忽略
    rounds: 10

# 上行链路是具有外部注册表的链接,用于提供对外部包的访问。
# 可以定义多个上行链路,每个上行链路都必须具有唯一的名称
uplinks:
  npmjs:
    url: https://registry.npmjs.org/ #
  yarn:
    url: https://registry.yarnpkg.com/
    timeout: 10s
  cnpm:
    url: https://registry.npmmirror.com/
    timeout: 10s

# 配置包访问的权限
# "$all" 所有用户, "$anonymous" 匿名用户, "$authenticated" 认证用户
packages:
  # 指定了对以 @dd/ 开头的所有包的访问和发布权限
  '@dd/*':
    # 特定作用域的包 @dd 一般为公司名 后面的为具体包名
    access: $all # 所有用户都能访问
    publish: $authenticated # 注册并且登录的用户才能发布
    unpublish: $authenticated # 注册并且登录的用户才能取消发布
    proxy: npmjs # 如果包在本地不可用,指定代理上行链路中的npmjs注册表

  '**':
    access: $all
    publish: $authenticated
    unpublish: $authenticated
    proxy: npmjs

server:
  keepAliveTimeout: 60
  # Allow `req.ip` to resolve properly when Verdaccio is behind a proxy or load-balancer
  # See: https://expressjs.com/en/guide/behind-proxies.html
  # trustProxy: '127.0.0.1'

# 是否允许离线发布
# publish:
#   allow_offline: false

# 配置 Verdaccio 的公共 URL 前缀,用于解决反向代理问题
# url_prefix: /verdaccio/
# VERDACCIO_PUBLIC_URL='https://somedomain.org';
# url_prefix: '/my_prefix'
# // url -> https://somedomain.org/my_prefix/
# VERDACCIO_PUBLIC_URL='https://somedomain.org';
# url_prefix: '/'
# // url -> https://somedomain.org/
# VERDACCIO_PUBLIC_URL='https://somedomain.org/first_prefix';
# url_prefix: '/second_prefix'
# // url -> https://somedomain.org/second_prefix/'

# 安全相关设置
# security:
#   api:
#     legacy: true
#     jwt:
#       sign:
#         expiresIn: 29d
#       verify:
#         someProp: [value]
#    web:
#      sign:
#        expiresIn: 1h # 1 hour by default
#      verify:
#         someProp: [value]

# 用户速率限制的设置
# userRateLimit:
#   windowMs: 50000
#   max: 1000

# 最大请求体大小限制
# max_body_size: 10mb

# 监听的地址和端口配置
listen:
#  localhost:4873            # 默认值,本机4873端口
#  http://localhost:4873     # 和上个配置相同
 - 0.0.0.0:4873              # 所有网络接口的 4873 端口
# - https://example.org:4873  # if you want to use https
# - "[::1]:4873"                # ipv6
# - unix:/tmp/verdaccio.sock    # unix socket

# https证书相关设置
# https:
#   key: ./path/verdaccio-key.pem
#   cert: ./path/verdaccio-cert.pem
#   ca: ./path/verdaccio-csr.pem

# 配置 HTTP 和 HTTPS 代理的设置
# http_proxy: http://something.local/
# https_proxy: https://something.local/

# 用于配置通知功能
# notify:
#   method: POST
#   headers: [{ "Content-Type": "application/json" }]
#   endpoint: https://usagge.hipchat.com/v2/room/3729485/notification?auth_token=mySecretToken
#   content: '{"color":"green","message":"New package published: * {{ name }}*","notify":true,"message_format":"text"}'

# 启用审核中间件
middlewares:
  audit:
    enabled: true

# 日志设置
# type: stdout:指定日志输出到标准输出流(stdout),通常是终端或命令行界面
# format: pretty:指定日志格式为漂亮的可读格式,这意味着日志信息将以易于阅读的方式呈现,通常包括时间戳、日志级别、消息内容等
# level: http:指定日志记录的级别为 http。这意味着只有级别为 http 及以上的日志信息(例如 http、warn、error 等)才会被输出。
log: { type: stdout, format: pretty, level: http }

# 一些实验性功能的设置
# experiments:
#  # support for npm token command
#  token: false
#  # disable writing body size to logs, read more on ticket 1912
#  bytesin_off: false
#  # enable tarball URL redirect for hosting tarball with a different server, the tarball_url_redirect can be a template string
#  tarball_url_redirect: 'https://mycdn.com/verdaccio/${packageName}/${filename}'
#  # the tarball_url_redirect can be a function, takes packageName and filename and returns the url, when working with a js configuration file
#  tarball_url_redirect(packageName, filename) {
#    const signedUrl = // generate a signed url
#    return signedUrl;
#  }

# 指定了网页界面的语言
i18n:
web: zh-CN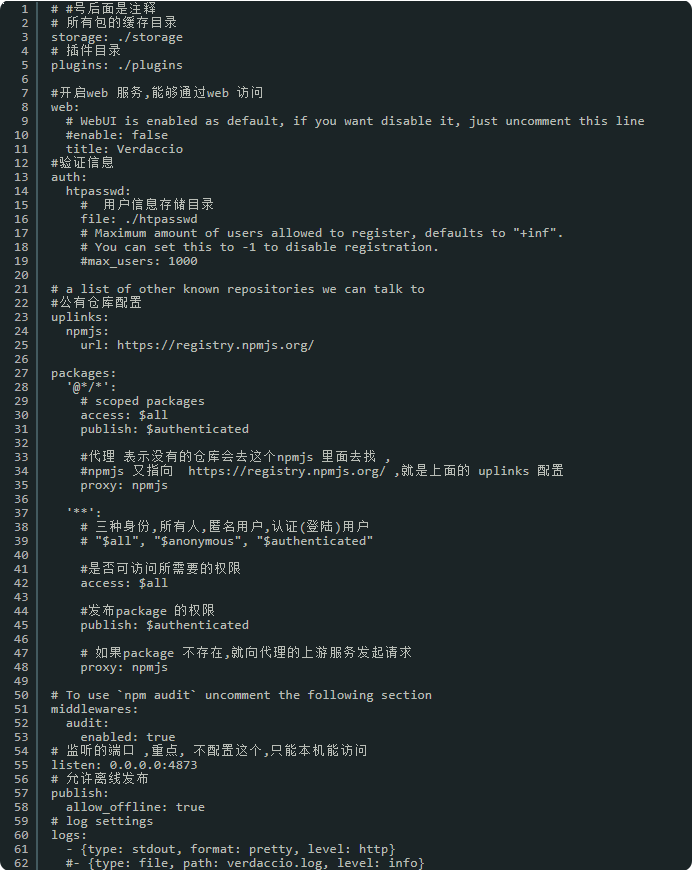 需要格外注意的是必须配置 listen: 0.0.0.0:4873 才能运行其他机子访问!!!
在离线时要发布依赖包必须设置 allow_offline: true !!!
Linux 系统下,需要配置如下 ~/.config/verdaccio/config.yaml
要允许所有ip访问,放开配置
// listen:

// 0.0.0.0:4873使用pm2管理Verdaccio
npm install pm2 -g

# 启用Verdaccio
pm2 start verdaccio

# 查看Verdaccio
pm2 show verdaccio使用pm2 list命令查看进程列表:
pm2 list

┌────┬────────────────────┬──────────┬──────┬───────────┬──────────┬──────────┐
│ id │ name               │ mode     │ ↺    │ status    │ cpu      │ memory   │
├────┼────────────────────┼──────────┼──────┼───────────┼──────────┼──────────┤
│ 0  │ verdaccio          │ fork     │ 0    │ online    │ 0%       │ 25.7mb   │
└────┴────────────────────┴──────────┴──────┴───────────┴──────────┴──────────┘还有以下常用选项可以加在启动命令后:
# 指定应用名称
--name <app_name>

# 设置应用程序加载的内存阈值
--max-memory-restart <200MB>

# 指定日志文件
--log <log_path>

# 自动重启间隔时间
--restart-delay <delay in ms>使用 pm2 启动 verdaccio 失败
使用pm2启动verdaccio后,输入pm2 list命令,会显示 verdaccio 程序状态为 errored,使用pm2 logs命令打印日志,输出如下错误:
Error: Cannot find module '/root/verdaccio'
    at Function.Module._resolveFilename (node:internal/modules/cjs/loader:956:15)
    at Function.Module._load (node:internal/modules/cjs/loader:804:27)
    at Object.<anonymous> (/root/node-v16.19.1-linux-x64/lib/node_modules/pm2/lib/ProcessContainerFork.js:33:23)
    at Module._compile (node:internal/modules/cjs/loader:1126:14)
    at Object.Module._extensions..js (node:internal/modules/cjs/loader:1180:10)
    at Module.load (node:internal/modules/cjs/loader:1004:32)
    at Function.Module._load (node:internal/modules/cjs/loader:839:12)
    at Function.executeUserEntryPoint [as runMain] (node:internal/modules/run_main:81:12)
    at node:internal/main/run_main_module:17:47 {
  code: 'MODULE_NOT_FOUND',
  requireStack: []
}报找不到verdacio模块的错误,可以尝试使用以下命令重新启动verdaccio:
$ pm2 start `which verdaccio`反引号 ` 是一种在很多编程语言中用来执行命令并将结果插入到字符串中的语法。
在这个特定的命令中,which verdaccio 执行了一个 shell 命令,即 which verdaccio,它会返回 Verdaccio 可执行文件的路径。
这个路径会被插入到 pm2 start 命令中,以便启动 Verdaccio 服务。
添加用户并设置npm镜像源
#当前npm 服务指向本地
npm set registry http://localhost:4873
# 注册用户 在本地注册一个用户然后指向我们的地址然后我们就可以发布包了
npm adduser --registry http://localhost:4873
Username: xxx
Password: xxx
Password:  xxx
Email: (this IS public) xxx
Logged in as yg-ui on http://localhost/ (你的ip地址)
这时候我们就注册一个用户,我们可以用这个用户名和密码去登录去上图窗口去登录了下次我们再登录时,只需要输入
npm login然后依次输入账户密码,接着检查当前用户。
npm who am i查看当前用户用户是否登录成功
内网npm私服搭建
将以下对应的外网目录拷贝到内网环境中
文件:C:\\Users\\用户名\\AppData\\Roaming\\npm\\verdaccio

文件:C:\\Users\\用户名\\AppData\\Roaming\\npm\\verdaccio.cmd

目录:C:\\Users\\用户名\\AppData\\Roaming\\npm\\node\_modules\\verdaccio

文件:C:\\Users\\用户名\\AppData\\Roaming\\verdaccio\\config.yaml

目录:C:\\Users\\用户名\\AppData\\Roaming\\verdaccio\\storage注意,其中 storage 目录是存放npm依赖包的地方, 我们可以先直接在外网发布好npm包,然后把storage文件夹复制到内网,接着打开内网verdaccio地址,就能发现这些依赖包自动发布到内网了。
我们发布依赖包到npm私服,有两种包,一种是自己开发的包,另一种是外网npm上的开源包,如果想要将开源包发布到自己的私服上使用
注意:要发布的npm依赖包,最好用npm下载,别用cnpm,因为cnpm包含了各种快捷方式,拷贝到其他电脑会出现各种问题
设置 registry
npm set registry http://localhost:4873/你可以在需要时带上 --registry 参数。
npm install --registry http://localhost:4873在你的 .npmrc 中设置一个 registry 属性。
registry=http://localhost:4873或在你的 package.json 中设置 publishConfig
{
  "publishConfig": {
    "registry": "http://localhost:4873"
  }
}发布包
在具体项目根目录执行
npm publish参考资料
Contributors
 Long Mo